
 Ever need a birthday (or just because) present for a kid that you have no clue what to buy for? Or possibly the kid has everything? I've been there several times, and I came up with the solution of little themed gift baskets when I'm not sure what to get somebody. They are fun for me to create and result in a bunch of little fun items instead of one something I have no idea if they will like.
I made these because I needed presents to bring home for a couple of cute kiddos in Indiana, but being right after Christmas and all 3 bdays around, they just didn't need abother "toy". I pick little items that are usable and fun for all kids. And even if they are too young to use a lunch box, it still doubles as a great container for holding small toys (cars, stickers, candy, crayons, ect.)
 Strawberry shortcake lunchbox: strawberry bubbles, stickers, socks, strawberry moarshmellows, strawberry pocky sticks, strawberry shortcake make your own candy necklace kit, and several lipglosses.
 Sports box: baseball bubbles, soft football, football washcloth, gummy sports candy, chocolate sports balls (for a 1 year old).
 Hello Kitty lunch box: Hello Kitty Pez, Hello Kitty band aids, Hello kitty snack sticks, Hello Kitty nail polish, Hellow kitty chapstick, Hello Kitty stickers, and Hello kitty Jelly beans.
To make you own lunch box gift I would suggest starting out at your local party store (Party City is awesome!) You can often find the same theme as the birthday party your attending. After you find the lunch box (or pail ect) they have all kinds of little things you can fill it with. When on the hunt for little items, I often go to the Target Dollar Spot, Dollar Tree, Toys R Us (candy section), Party City, and sometimes Wal-mart. Then add a cute little tag and some tissue paper and ta-da!
These boxes run about 5 each and I spend approx $1.00 on each filler item. Which means a box will run about $10.00-$15.00 each! Once again hope you enjoy and can use this idea in the future!


 Thoughts for the mommy as she enters the jungle!
 We played two games, baby animal names and a baby brand game
 The "watering hole"..
 baby animal cracker favors...
 Cupcakes I made along with the little animal toppers...


 All the goodies!!!
 The banner we made, which doubles as a great nursery decor...
 The beautiful mommy-to-be!
 Her animal quilt made by, Cindy Miller...isn't she so talented!?!
 Our gift to Kellie, a whale bath tub filled with animal items!
 We made this to hang in his room :)
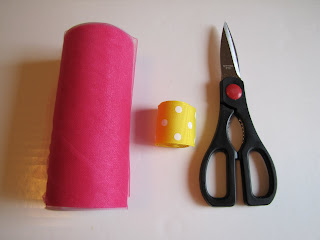


 Step 6: Slide knots along ribbon to center and create the desired look. The more you sqeeze in the fuller the tutu will be. Make sure you have an equal amount of ribbon on the ends. Then tighten each know by pulling just underneath it.
  Fold and cut the ribbon ends to create a V end. If you would like to heat seal the ribbon ends so they dont fray. Quickly run a lighter close to the ribbon along the cut edges. The heat from the flam will melt the ribbon to keep it from fraying. (DO NOT touch flame directly to the ribbon)


 Here's Miley modeling hers! Notice the tip toes...she's a natural ballerina!
  Tada!! Tutu cute!!
 mommy's barefoot babies in their "I love Daddy"and "I love Mommy" shirts...having two sometimes does come in handy :)
 Of course Grandma Miller and Aunt Amber had to send them Valentines! This picture does no justice..their boxes are always filled with adorable things. This one included Handmade cards, shirts...and cute red and white candies and tiny animal crackers....so cute! The kids were thrilled.
 I had orginally planned on giving the cookies I made to Cadence's ballet class....2 hours before class walking through the store I realize I totally forgot about them and they were still frozen at home! I ended up picking up some lip/heart cookies and girly little tins with candy in them for all the littler ballerinas. Being the crazy that I am I couldn't just take something super simple like heart fruit snacks! (thumps head on wall) so here I am driving down the road stuffing treats into bags. Hint's the carseat photo..had to share though...it was a super mom moment for sure!


