Tuesday, September 11, 2012

Graveyard Pudding {Beware of bones!}


"What are you up to today?"..."Oh you know, making little puddings with edible bones it in, you?"
 If you hang around me enough conversations like this are kinda the norm. Matter of fact I don't think my friends even blink, I'm not sure there's really much I can do to surprise them anymore. In my defense my oldest daughter has been repeatedly been asking for "dirt pudding"for awhile now so today I sat aside some fall baking I had planned and made pudding with her, with Halloween coming up I decided to spook it up just a bit. 


We mixed up the popular graveyard pudding by leaving out the tombstones, layering Oreo crumbs and devil's food pudding, filling it up with chocolate bones, then topping it off with grass sprinkles. After they were done we called over the neighbor kids to enjoy our afternoon snack, and much to my suprise these were a big hit. All of the kids really got a kick out of the bones mixed in the pudding, even the big kids. I kept hearing "ut oh I got a bone!" lol. We didn't have any gummy worms around but I'm sure they would have been a perfect addition.

Here's what you'll need to make some: 
4 cups milk
2 boxes of Jell-0 pudding (Devils food was a good dark pudding)
Oreos
Green sprinkles
White melting chocolate
Wilton skeleton candy mold
Bone sprinkles (optional)
Black food coloring (optional)

Makes approx. 6 servings.


You can pick up one of these molds and your local craft store for less then $2.00. Aren't those brownies awesome? We may have to put that on our "to bake" list :).


Step 1: Measure out 1/4 cup of white chocolate candy melts or about 2.25 oz of white melting chocolate. This is enough to fill the candy mold once. 1 mold was enough "bones" for all 6 desserts. Place in microwave safe bowl and microwave at 50% power for 25 seconds then in 15 seconds spurts until melted, stirring in between each time. (I have found adding just a bit of crisco helps it get to a better consistency)


Step 2: Pour melted chocolate into a ziplock bag and cut tip, fill each bone cavity. Tapping the candy mold on the counter a bit after each cavity helps remove bubbles and smooth chocolate. Don't worry if it's a little messy mine were messy on the back and perfect on the front! Let set in freezer until firm, about 15 minutes.


Step 3: Whisk together 4 cups of milk and 2 boxes of Jello pudding for 2 minutes. I added just a little bit of black food coloring to help darken the pudding. Completely optional, but I'm kinda obsessive compulsive like that. Let chill in fridge for 5 minutes to fully set up.


Step 4: Pull apart 10-12 Oreos and scrape off the cream center. Go ahead let the kiddos enjoy it :) Crush up Oreos cookies. I like to use my ninja because it's amazing, makes perfect Oreo crumbles...really more like a powder! Look's just like dirt...if dirt were clean and all. 


Step 5: Add a layer of Oreo crumbs to each cup bottom. I filled each with about one TBS of Oreo crumbs you amount may change with the size of cup you use. Then add a little bone sprinkles if you'd like. 


Step 6: Once ready pop these little guys out of the tray by gently twisting the edges back and forth until they all fall out. Kind cute for bones right? :P


Step 7: Spoon or pipe your chocolate pudding into the little serving cups. I stopped half way and added a bone of two to each cup then finished covering up with pudding.


Step 8: Level off with some Oreo crumbs.


Step 9: Top with green sprinkles, chocolate bones, and sprinkle bones!


Now enjoy your spooky snack. But beware, don't choke on any bones!

Happy baking!

I'm linking up in what I made Wednesday!


Friday, September 7, 2012

Easy Fall Decorated Cookies {rolled chocolate}

First off I should probably to let you know, I'm really not a cookie decorater. As much as I love to swoon over the beautiful cookies I see all over the web, it's not my thing. Don't get me wrong I love to bake cookies and decorating them is even more fun, but it takes lots and lots of practice to really get it down and I just don't make enough cookies to do so. I always have to be doing something else, changing it up ya know. Sometimes I think I have the attention span of a two year old. Every once in a while I'll get an itch and I've got to make a few cookies...and I get a little better each time but still no Sugar Belle. So if your one of those with an amazing royal icing hand, please avert your eyes now :).


 I really wasn't going to share these cookies at all...they were not what I had envisioned and I ended up going the easy route. But after all was said and done they were really yummy, perfect for fall, and easy to make. Since I get so many questions about rolled cookies I thought why the heck not share them. Really they are a great start for beginner cookie enthusiast or for those of you that have always wanted to know how the heck they get that smooth icing on there. Maybe you'll pick up a thing or two about rolling cookies as well. If nothing else this chocolate cookie recipe had to be passed on.

I recently found this set of cookie cutters at Micheal's and despite the fact that they are meant to make a grave yard I thought fall trees! I could make some pretty cute cookies with those fall leaf sprinkles I have. I had to bring a treat to fall bible study kick off this week and I thought what a perfect time to make them! Everything went smoothly right up until the sprinkles...you know those leaf ones I was talking about, turns out I didn't have any after all. Remove apron, hang head, get in car, drive to Micheal's, buy smaller not as cute version, drive home, re-think plan, be happy with simpler cookies (that's pretty much how it went).


The little cutters I used are also a set from Wilton, they can be found just about anywhere this time of year. I just saw them at Michael's, Wal-Mart, and Target this week.


Now about the cookie...I used a new to me chocolate rolled cookie this time by LilaLoa called The End-All for Chocolate Cookie Recipe. I promise they live up to their name. My husband was a skeptic because he loves the normal chocolate one I use, but this one was honestly better or shall we say, "on point". These little guys cooked up almost perfect the recipe was easy and quick - no chilling even. Soft, chewy, chocolate...like hello treadmill good. Visit her site for more info on them...and while your add it check out all her other amazingness.

First let's bake those cookies! Here's what your going to need:

Cookies

1 cup butter
1/4 cup shortening
1 1/2 cups granulated sugar
2 eggs
1 teaspoon vanilla
1 teaspoon salt
3/4 teaspoon baking powder
2/3 cup cocoa
3 or 3 1/2 cups flour

Royal Icing
4 cups powdered sugar
3 TBS meringue powder
6 TBS warm water 
Brown and black gel food coloring

Other items needed: 
Cutters 
Sprinkles
Wax paper
Dusting flour
2 1/4 in doll rod
Rolling pin
Cookie sheet
Cooling rack
Parchment paper
Icing bottle

With one batch I was able to make 24 tree cookies and about 24 small leafs.


Step 1: Preheat oven to 350 degrees.

Step 2: Cream together butter, shortening, and sugar. Add in the eggs and vanilla, mix well. Add in baking powder and salt, mix well. Add in cocoa powder, mix again. until well blended. Now add in flour 1 cup at a time. If you are going to be making it right away add 3 1/2 cups if your going to be letting it chill to make later just add 3. 

**For more tips and info on this recipe visit her orginal post here.**

Step 3: Prep the workspace. Here is how I roll out my cookies to get a smooth even cookie. I use two flour dusted pieces of wax paper, 2 1/4 inch doll rods, and a rolling pin.


Step 3: Lay dough on to flour dusted wax paper and place second piece flour side down on top of dough. Lay doll rods on each side then roll out the dough with your rolling pin. The rolling in will eventually roll along top of the doll rods making all you dough the same height and the wax paper will keep your dough super smooth.


Kinda an ah-ha moment right?


Now place the cookies on a parchment paper cookie sheet. This is key! You really can't skip this step. The parchment paper allows you to pull the cookies off the sheet without using a spatula and mess up the shape. Just another little note try to bake cookies of the same size at one time so your not having little overdone cookies or bigger underdone cookies. And...if your saying but won't those bake together? Sometimes yes, but in this case these cookies didn't grow at all..seriously the perfect cookie!


Once they are done you can quickly slide the cookies onto a cooling rack. DO NOT move the cookies until cooled. Once cooled I grab a spatula and move them into stacks. 


Perfectly cooked little trees and it really wasn't that painful at all! Once you've got it done it's really fun and they come out awesome! 

Now if I were an amazing cookie decorator I would tell you to let these cookies set overnight in an airtight container. (I've read fresh baked cookies often release oil etc into the icing) But remember I'm the lady who didn't even have the right sprinkles and was baking the night before...so I let them cool and it was on to decorating! While they were cooling I whipped up the royal icing.

Now here's where I should explain a bit. If you are new to royal icing most cookies you will see have been made with two different consistencies of icing the same color. One of toothpaste like consistency to outline the design and a thinner liquid one to fill the design. Remember my plan didn't go as planned so I decided to use the cheater method. A medium consistency that can both outline and flood a cookie, for fast little projects like I said a great starter cookie!

Ready...let's go!

In a medium mixing bowl mix together 4 cups powdered sugar and 3 TBS meringue powder. Once mixed add 6 Table spoons warm water. Be careful! Take it slowly and measure correctly and you'll be good but just remember a little water goes a long way when it comes to royal icing.

The next step is optional. It took me about 1 cup of royal icing to ice 24 tree cookies. I separated the rest in an air tight container to use for the little leaf cookies. Work quickly! The icing sets with air. So you always want to keep potions your not using sealed tight.


Now add some brown gel coloring...and a little more...and a little more...heck dump the jar in. Ok maybe not the jar but it does take a lot to get brown. I even added a few drops of black to help it move along.


Ahh...there we go. Tree bark brown. Back off Crayola, no need to be naming crayons here. :P


Ok now here's the next amazing trick (learned from SugarBelle). Use a spray bottle to thin the icing. If you don't have one of course you can just put in water a drip at a time. But if you plan on making any more in the future it will be the best .97 cent investment ever! I can't tell you how many times I over thinned icing...seriously a little goes a long way.


Continue adding squirts of warm brown water until you get a thin tooth paste consistency. This is actually called 20 second icing and heres why. When you draw a line in it the line should disappear and settle in about 20 seconds. But out the cell phone and use the stop watch to get it to that perfect point.


See 20 seconds and no line. (sry my finger was a little slow on the stopping)


Now pour you icing into a bottle (can be found for about a buck at Wal-Mart of any craft store) and wrap up the rest. 


Time to set up your work space. I like to keep my icing in a cup upside down to keep the bubbles at bay and the icing ready to go, and you'll want to grab a toothpick and some paper towel.


Using your bottle outline the tree. As with all piping it's all about the PRESSURE! Apply a medium consistent pressure...allow the icing to fall ad you work slightly ahead. If this is your first time trying this out maybe practice on some wax paper to see how the icing falls. Right after outlining fill in with icing then use a toothpick to pull push around any icing and fill in holes. Within 20 seconds it should smooth out. Then you can add your little leaf sprinkles. I've photographed the steps separate below for you, but while your working you will want to do all three steps at the same time, completing one tree then moving to the next.


And that's a wrap. Simple but fun easy chocolate rolled fall decorated cookies (say that five times fast).

I used my extra icing to split into four and make simple yellow, red, orange, and maroon leafs. Which you can make the same way. Once they have sit for about an hour you can gently pipe some lines on the top.

In case you're totally inspired to learn more here are some awesome resources for you! You know the ladies that can actually call them self cookie decorators.

The Adventures of Sweet Sugar Belle

Glorious Treats

LilaLoa


Well that's it for today folks. Hope you learned a little something today. Like check your sprinkle stash before baking the cookies ;)

Happy baking!

Thursday, September 6, 2012

Birthday Cake Fudge


WE'VE MOVED!
Come join Make Bake Celebrate on our brand new domain!
Pack up your sprinkles and join us at
www.makebakecelebrate.com

Looking for Birthday Cake Fudge?! Find them HERE...

Wednesday, September 5, 2012

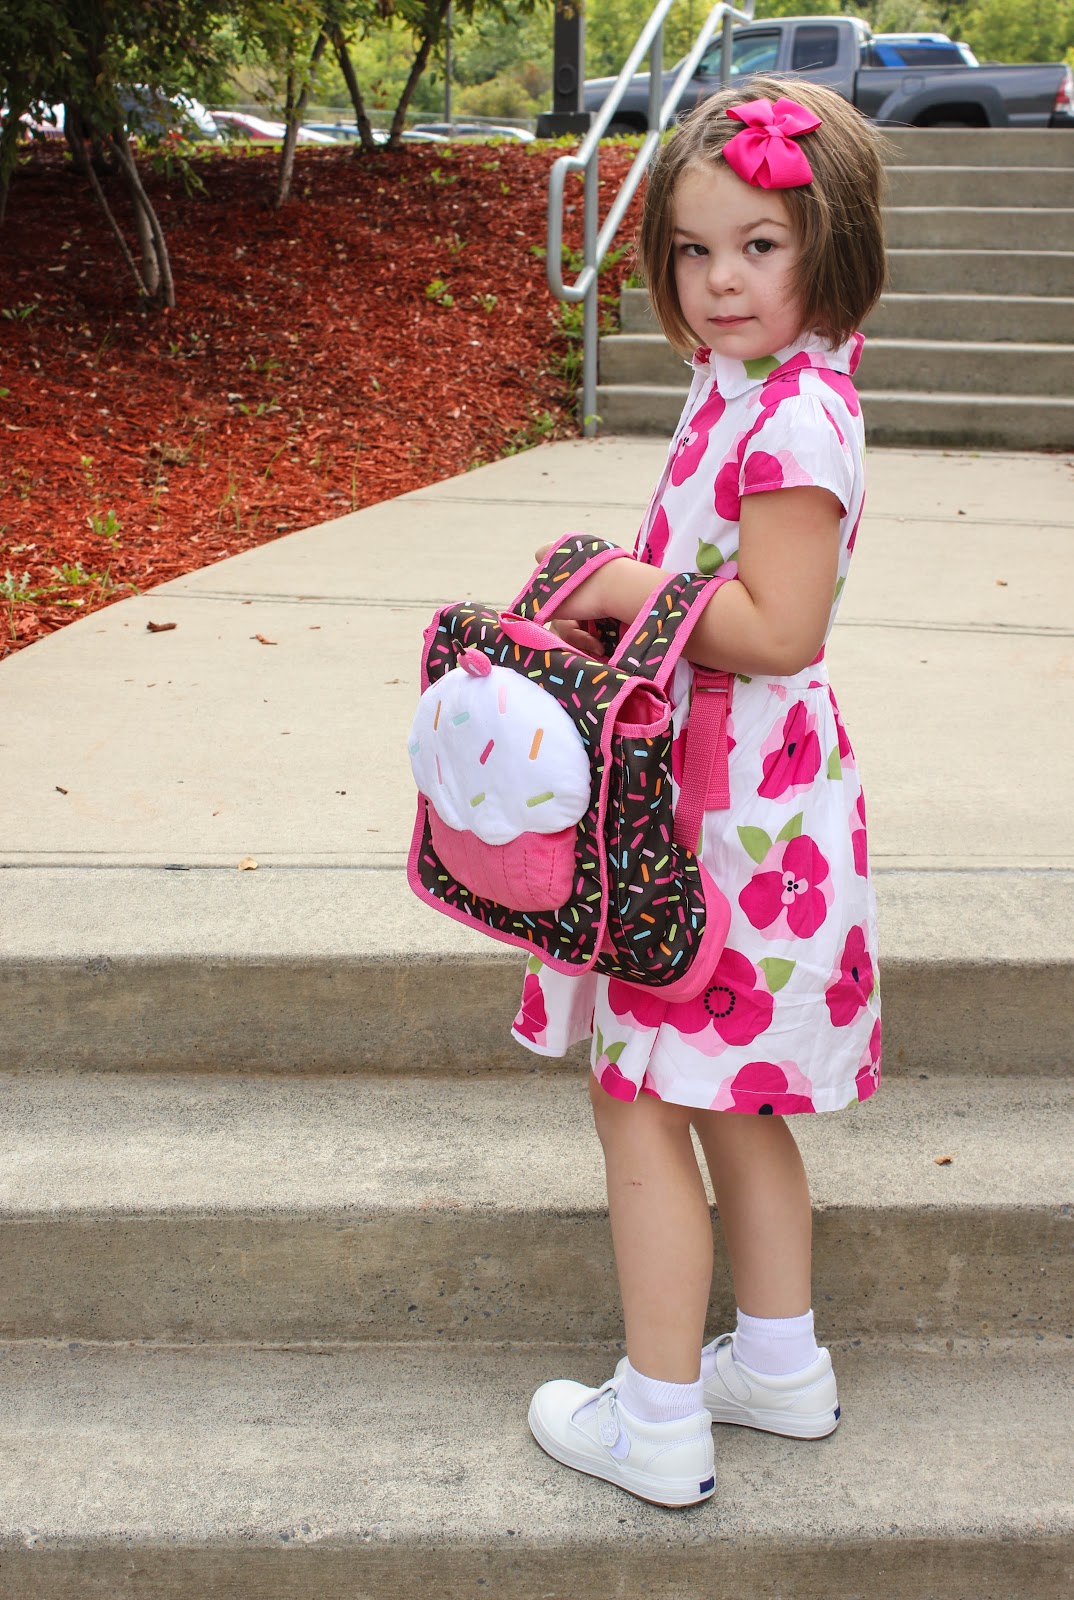
Our very first, first day of school!


Today I'm  taking a break from all things sweet and crafty to share a very special milestone we reached as a family, the first day of school. Since I'm writing this post you can assume we made it through without any complete disasters lol. If you remember yesterdays post I wasn't exactly ready...but things worked out in the end as they always do. To some, the first day of Pre-K might not be such a big deal but for us it was a huge step and a change for all. For starters, Cadence is our first child, so this was our very first first day and as with any family that's kinda a big deal! Then there is the fact that we weren't sure we would ever be sending her to school at all. We have spent the last few years debating weather we would send our children to school or homeschool them in our home. I could go on and on with our pro's and con's list. Our biblical views and military lifestyle played a huge roll in considering which was right for our family. Ultimately I was worried about her being so molded in the secular school system. I was worried about her switching schools often, sometimes military kids switch several times a year. On the other side I was sad she would be missing out on things like school plays and prom, and maybe she needed the social structure because she was moving around so much? Our pros and con lists were a mile long on both sides. I was such a hard choice to make.

After going back and forth, praying, and talking, and praying some more it wasn't until a friend reminded us that sending her to school would be sending our little light out into the world. That she would have a chance to impress her glowing spirit and make a difference. That she could still learn her to be helpful, to be caring, to be loving, even when those around her aren't. Sending her to school will stretch her in ways we can't at home. That week I was able to sign her up and get one of the few spots a the local elementary school. She was THRILLED!


I was still a little nervous how things would work out. Because it's Pre-K she can't ride the bus...which means I have to drag out the two 2 year olds every day twice a day just to get her to school. And there's no awesome drive up situation like most little pre-schools...I have to get both littles out and take them in...think dead of winter in upstate New York. Everybody's routine has been effected. For 4.5 years daddy has gotten up before the kids and I with plenty of time to get himself dressed and ready for the day. The kids and I aside from sparatic appointments, functions, and playdates have always been on our on schedule. If the kids are in pajamas at lunch so what, and maybe I decided to bake something random instead of do the laundry, not that ever happens really ;).Now daddy will be getting ready along with the rest and playing a roll in the process, I'll be headed out the door before him, and a strict routine will have to be kept. Routine. Schedule. Chaos. Welcoming to parenting older children 101 :)


So this morning she headed off to school. Of course she loved it..and a light she was. She went into the class with all the confidence in the world, smiling and greeting the teacher the second she got to the door. And after she came bouncing out to the car like she had just won an Olympic medal, grinning ear to ear. Her only complaint was she couldn't stay for the PM session! And I couldn't have been any happier for her.  I know we made the right choice and I can't wait to see how her journey continues.


Plus I got to buy her this cute cupcake backpack...win win right?


I was able to grab these photos very quick before school. I decided to skip the whole hold up a sign thing that everybody is doing now. There's no way I'll be able to keep the signs same signs around till they graduate lol. So I thought I would just photoshop the year and grade. Each year I plan on making a  year shot along with a pintrest inspired favorites shot then keep them in an album for her. Something cool to lay out at graduation and keep for yesteryear memories :)

There she goes. Off to light up the world. We love you sweet baby girl.


Next week all THREE girls start ballet, just to make our life a little more busy.  
But don't worry even with all the changes around here...I have lots to share! I'll be back soon with a drool on you screen dessert, promise :).


Tuesday, September 4, 2012

Fall Subway Art {FREE printable}


It's official, in the Miller house it's fall. We've busted out the pumpkins, and the house smells of oats and honey Scentsy, the kids are headed back to school, we've made our trail mix, and even some pumpkin treats. The calendar can argue all it wants, I don't really care cause here it's fall :) Besides I have a bone to pick with whoever rules the calendar anyway...if trail mix and jello gets their own day then so should bakers and why on earth does fall not start till almost October. ;) Anyway...

Most kiddos seem to have already started school or went back today. Our area doesn't go back till tomorrow...so I've been enjoying all the cute back to school pictures on Facebook today. Which made me realize I'm completely unprepared for our cupcake to start Pre-K tomorrow. Teacher treat made...nope....first day outfit...nope....cute snack planned...eh...cute little Pre-K sign to hold up for pictures...nada...schedule worked out...ha...and where the heck is her book bag? Wait did we even get a book bag? Just kidding. And then I realized oh my gosh...I'm going to have to break it to her cupcake-ology really isn't a subject! Well at least there it's not :) But on the bright side...I do know where her school is and what time it starts so I'm optimistic between now and 9am tomorrow we'll work out all the other little details, maybe.

Before I bursted my own bubble realizing I had a lot to do tonight...I worked on some new fall decor, including this new subway art I just made. I always love these prints and have never got around to making one of my own. I think it turned out pretty cute! Now I may just have to make some for a few more holidays/seasons. 


I printed this one on off white paper which really helped it blend in with the fall decor. Of course you can always print it on plain white if you'd like. Also, I made this to fill an 8.5 X 11 frame and standard paper. So if you would like it to fit in an 8 X 10 just adjust the size when printing, as if you were printing a photo. Just click to print :).


I hope this brings warm fuzzy feelings of fall to your home...and that your back to school to do's are all done in a chaos free manor :)


Happy making!


Monday, September 3, 2012

Chocolate Covered Pumpkin Pretzels

WE'VE MOVED!
Come join Make Bake Celebrate on our brand new domain!
Pack up your sprinkles and join us at
www.makebakecelebrate.com

Looking for PUMPKIN PRETZELS?! Find them HERE...

Friday, August 31, 2012

Fall Trail Mix {with FREE printable}


WE'VE MOVED!
Come join Make Bake Celebrate on our brand new domain!

Pack up your sprinkles and join us at


Looking for Fall Trail Mix With Free Printable?! Find them HERE...