Thursday, September 20, 2012

{Candy Corn Week} Candy Corn Fudge!


It it possible to have a bad photography week? Because I'm pretty sure I'm having one. Which really kinda stinks because it's Candy Corn Week and I feel like I'm totally disrespecting this little guys by posting crappy photos...oh they don't have feelings? Really? Well then I guess I'm good then...other then I should probably say sorry to you guys for having to look at my crappy photos. Sorry. We good? Great.

I even debated sharing this fudge at all. In person this candy corn fudge was seriously adorable. Ever since I was introduced to the recipe awhile back I knew I had to use it for some fun Holiday ones...and candy corn was a must try. I was thrilled how it came out...the fudge was perfect and even the lines were straight! I squealed a bit as I cut the fudge into their triangle shapes I laid them on the platter and we were set to photograph. But the sun decide to come out for once this week and made them incredibly sticky the longer I took...and I moved them too much with my warm hands because they started to stick to me and stick to each other kinda making a mess. It was kind of no fun. I was really disappointed to upload the photos and see none of them really were even good :( After the fact I realized I probably should have froze the ones I was going to photograph...opps lesson learned. Ok enough of my obsessive compulsive complaining.

But I decided despite my lack of photography skills this week (not that I have much more any other week) I still had to post these. They were just to cute not too. These rank about a caveman on the easy scale so unless your going to be moving them lots, attempting to pose them, or forcing them to model for your pictures...you won't have any problems from them. 

Here's what your going to need:
2 Cans of white icing
2 Bags of white chocolate chips
Orange food coloring
Yellow food coloring

Just a little note..I used the frosting creations starter icing because I have a stash of it thanks to my couponing habits but you can use any white icing.


Step 1: Separate your icing and white chocolate into three bowls. Each bowl will get 1 1/3 cup icing/chips. Then line a 9X9 pan with foil.


Step 2: Color one bowl of icing orange, and the other bowl of icing yellow. Your going to be mixing with an equal part of white chocolate chips which will tame the color just a bit...so you want your icing color to be nice and bold.


Step 3: Pour one bowl of chocolate chips into a microwave safe bowl. Microwave in 30 second spurts at 50%-60% power until almost fully melted. I have found that if I pull them out while there is just a bit of the shape left and stir for a moment it's perfect. As your stir the rest will melt and you won't have to worry about burning the chocolate. Just make sure you get them all melted or you will have chunks in your fudge. 


Step 4: Mix in your yellow icing. I like to kind of fold it in and run the spatula over it to make sure all the chips are gone and it's smooth and fully mixed. 


Step 5: Pour into a foil lined pan. This fudge smooths out so well, I love it!


Step 5: And just to make sure it's nice and smooth I like to take a piece of wax paper and a cake smoother and go over the top gently.


Nice and smooth. Now place it in the fridge for about 5 minutes to let it firm up a bit. This gave me the perfect chance to wash out the bowls that were now empty from the yellow layer, including the mixing bowl that I would need to use again. 


 Step 6: Once it has set up for a few moments and your bowls are all clean you can repeat the steps again with orange and white. 


Step 6: Once your last layer is on let it set for about an hour, although it will be firm enough before the hour is up, your going to want it nice and firm to cut. 

Step 7: Lift out of the pan using and gently pull back the foil. 


Step 6: Start out by trimming off the rounded messy sides just a bit. I sent most of this fudge to friends so these little extra cuts were perfect to let the kids try.:) If you feel like your fudge is still kind of soft or sticky throw in in the freezer just a bit, it cuts nicer hard and it will soften back up.


Step 7: Slice the square into 1/2 inch slices. I kept a kitchen towel near to I could wipe of the fudge on the blade because every bit of color will change the look a bit.


Step 8: Now just slice up the lengths using diagonal cuts. 


Of course half of your candy corn will be the wrong way...and you know how much that drives me nuts. But don't worry not many people are like me and will notice..and if they do they won't complain, because it's hard to complain with your mouth full :)

Bonus points...since your pan was lined with foil and you washed all your bowls in between steps you should have almost nothing to wash. You're welcome ;).

Enjoy one last crappy photo...


Happy Baking!


Wednesday, September 19, 2012

{Candy Corn Week!} Candy Corn Cupcakes


Day three of Candy Corn Week!! You know the week just wouldn't be complete without some cupcakes, so for today I'm sharing how to ice cupcakes to look just like candy corns. I first made these last year and they were a huge hit seemed like everybody wanted to know how I got the shape. So I'm back this year to share. Sure it's been a whole year but think of it as building anticipation...or something. ;)


Of course I could have just iced them in three swirls of the colors and called it good but that's just not my style...always needing to make things just a little more complicated then they have to be or so the hubs says. Plus, I really like how these take on the actual shape on a candy corn, they are really fun! A giant soft candy corn on top of a little cake...what's not to love really! It's really much easier then you would probably think...

You can use any semi stiff buttercream I used the same one I posted here. Once batch will ice about 24 cupcakes or a half batch for 12. You're also going to need yellow and orange gel coloring, a pipping bag with a large round tip (3 if you have them), and a few sheets of Viva paper towel. 

Step 1: Spoon your icing into three bowls each one getting a little more then the last. There's no exact measurement here just remember your going to be using less orange and a lot less white. I just kind of eyeballed it. 


Step 2: Dye the bowl with the most frosting yellow and the second most orange of course leave the white icing white :).


Step 3: Now fill a pipping bag with yellow frosting, you will need a large round tip. I used wilton #2A. If you have three of these you can go ahead and fill all three. If not no worries, you will just have to wash after each color,


Step 4: First pipe a "blob" on to your cupcake and a outside ring, do this twice for the yellow. 


Step 5: Now pipe a double swirl on top of the yellow, slightly smaller in width then the yellow. You can just swirl this like how you might normally pipe a cupcake.


Step 6: Now pipe a simple dot on top pulling up while releasing pressure. Really you could stop here cause these are pretty cute too...but now were going to shape them.


Step 7: Using a clean piece of viva towel gently lay the paper on the cupcake and very gently smooth out lumps with your finger on the other side. I did so by using the side of my finger going up and down.You can slowly lift and move the towel around the cupcake to smooth out the whole thing. You will need to use a clean sheet of Viva every few cupcakes. Just remember to be gentle so you won't damage the icing or pull down the colors too much.


It's really not an exact science, something you just have to try once but I promise it's not hard! Also these would make great mini cupcakes...you could just pipe on dots for each layer getting smaller each time.

The hardest part about these is figuring out where to bite them first? 


That's all for today! I'll be back tomorrow with more of the white, orange, and yellow stuff...don't miss out on the fun! Like MBC on Facebook for all the latest updates and maybe just maybe a little end of the week giveaway on Friday, and share with your friends because I'm pretty sure they like candy corn too ;).


Happy Baking!

Tuesday, September 18, 2012

{Candy Corn Week!} Sweet and Salty Candy Corn Bark


It's day two of candy corn week and today I'm sharing something sweet and salty, candy corn bark. Sure bark is nothing new, and I've even seen lots of candy corn bark...but it still made my top five list for the following reasons:

1. I love of white chocolate (I was the weird kid asking for the white choclate bunny)
2. I love pretzels and chocolate (ranking second to peanut butter and chocolate of course)
3. It's incredibly easy and fast (the final step involves breaking...hello)
4. It allows me to use up random candy and things that I have left over (bonus points)
5. I really needed a reason to use my candy corn bowl (cuteness like that only comes from Target)

In no particular order...although reason 5 may have been the most influential. :)


Speaking of my candy corn bowl...did you notice a problem at all? No? Look again...see the colors orange, yellow, and white....the WRONG color pattern for a real candy corn. Yep, it's an imposture but I still really like it despite the fact that it drives me nuts. Last year I actually made my girls shirts all wrong because this bowl was sitting out and I looked at it. Since then I've noticed lots of things out that are in the wrong order. Obsessive compulsive I know...


I also loved how much the kiddos could help out on this one. Even our littles got in on this one. This stuff is so easy you probably don't even need a how to, so if  you'd like you can skip to the cute chipmunk story at the end... but just in case here's what your going to need:

Almond Bark
Pretzels
Peanuts
Candy Corn
Sprinkles
Yellow and Orange candy melts
Sprinkles
Candy corn m&m's (oops they missed the shot)

This is simply what I used but feel free to add in or take out things as you would like. Wouldn't the candy corn Oreos make a great addition? 


Step 1: Layer your salty items on a wax covered baking sheet. Make sure the wax is wide enough the come up the sides a bit for easy removal. (great kiddo step)


Step 2: Melt the entire almond bark in the microwave. I used a microwave bowl and started with 90 seconds at about 50%-60% power..then continued with 30 second spurts at 50%-60% until melted, stirring in between. (I feel like I've said that A LOT lately)


Step 3: Slowly pour over the salty layer...use your spatula to gently spread it out a bit.


Step 4: Toss on some candies.... (another great kiddo step)


...and maybe a few sprinkles.


Step 5: Drizzle on some yellow and orange candy melts...I did so by placing a few candy melts in a ziplock bag and melting in the microwave the simply cutting the tip. Once for each color. Let sit until firm, I waited about an hour but you could place it in the fridge to speed it up.


Step 6: Once it's nice and hard you should be able to lift the entire thing up..once giant piece of chocolate! Then just break it all up. (more kid fun)


But wait! Before you go I have one more thing to share.. I'm sure you've seen squirrels and acorns but what about chipmunks and candy corns? You see we have this friendly little neighborhood chipmunk. we often find him sneaking into our garages and hanging out while the kids are outside...he even made a home in our landscaping. So while I was outside photographing the bark I dropped a few m&ms on accident. Next thing I know this little guy was at my feet chewing on them. I mean seriously at my feet...I didn't use my zoom at all. He kept getting closer and closer (and I got a little more squeamish) and next thing I know I look down and this little guy is CHEWING on my pants. I kid you not, I can't make this stuff up! I. about. died. Not sure what to do I tossed down a few candy corns...and sure enough he ran to them. Feeling bad about possibly sending him into a sugar coma I left some bread and veggies out from dinner (several feet from where I was working :) ) He came and got the bread and left the veggies and then continues to wait around most likely wanting some more candy corn. Who knew chipmunks liked candy corn and perfer them over veggies!?


Maybe  I'll leave some of the crumbs out once were all done...slim chance ;)


Happy crunching, melting, pouring, and breaking! 

Monday, September 17, 2012

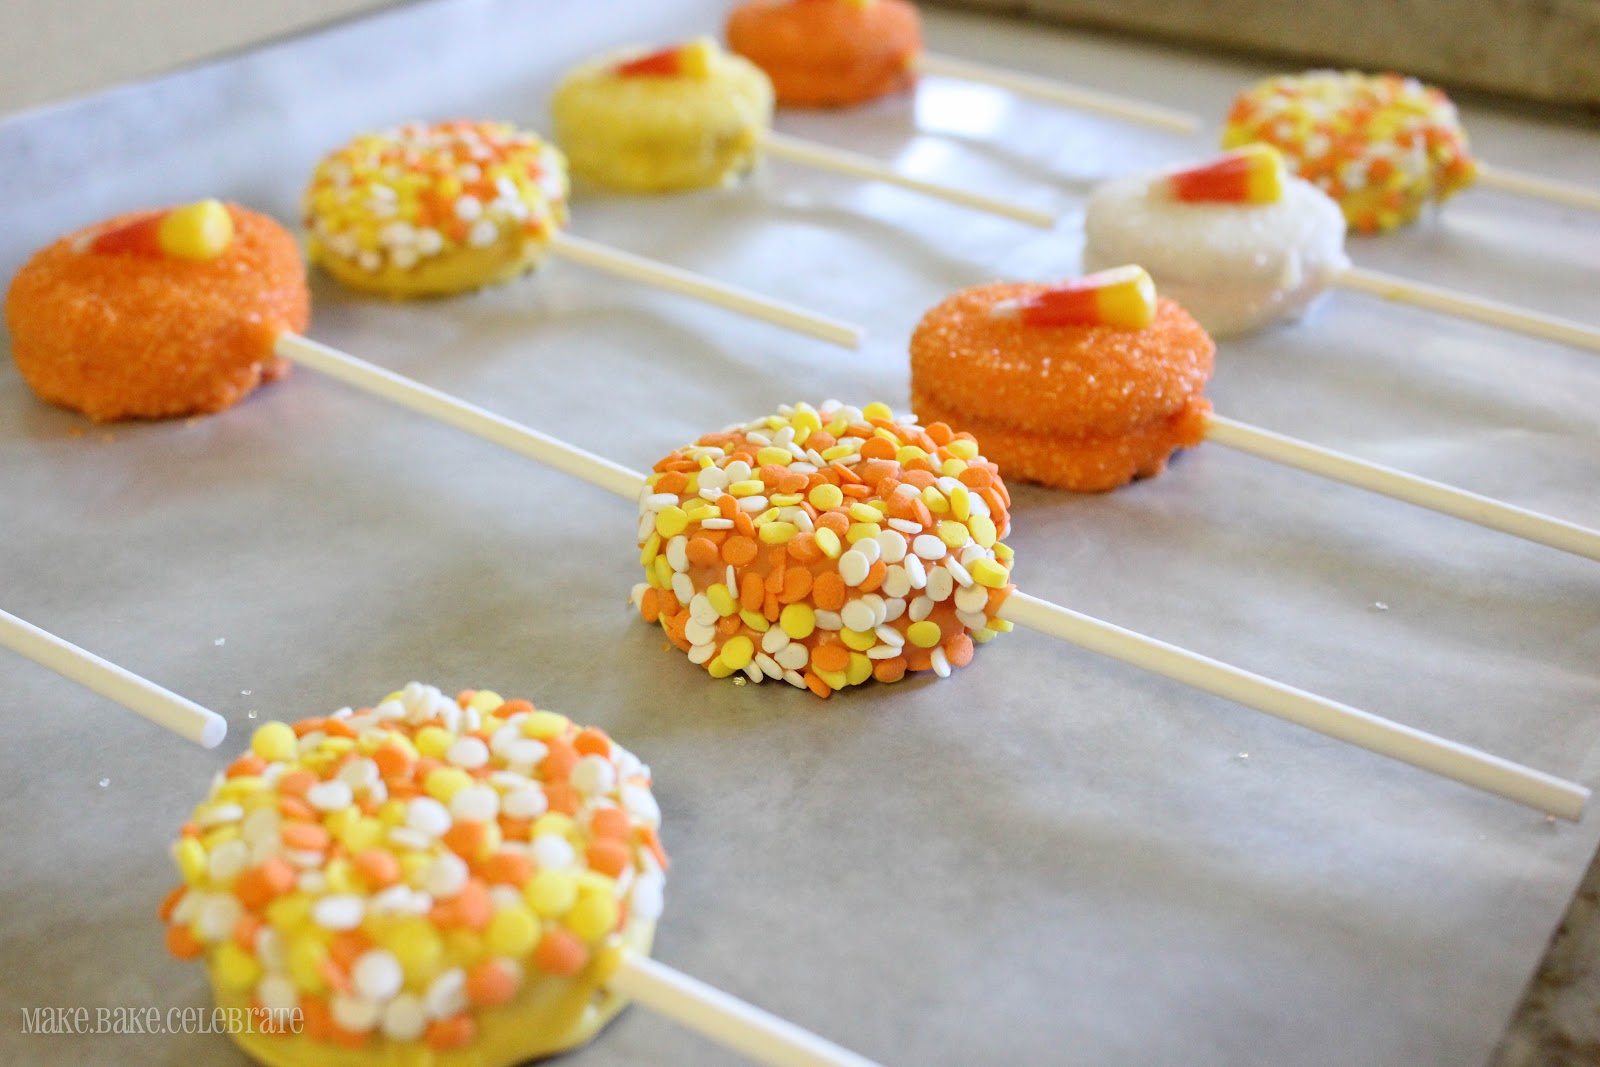
{Candy Corn Week!} Candy Corn Oreo Pops


Chocolate Covered - Candy Corn - Oreos - On A Stick - Drowned In Sprinkles. Need I really say more?


 Although, I should probably tell you...it's CANDY CORN WEEK!!! I love making all things candy corn about this time of year and I have so many treats to share I thought we'd pack em all into a week long white, orange, and yellow fiesta. The hard part is picking which to share...because my list of candy corn inspired projects is a page long :)

Unless you've been hiding under a rock you've probably seen these little guys around either in the store or on Facebook. Turns out they are going to be a Target exclusive this year! Yet another reason to love Target, they really know how to suck ya in huh. After seeing them on Facebook I stalked our Target for what felt like f-o-r-e-v-e-r until I finally found them, and they were already almost gone! So if your a lover of candy corn and Oreos you may just want to make a dash for it.


So of course we brought a few packages home, surely there was cute treats to be made with these.
It only seemed right to dip them in white chocolate and dress them up for the fiesta. A nice easy fairly mess free treat for the kiddos - perfect for play dates and school treats.

Here's what your going to need:
Candy corn oreos
Candy melts or white melting chocolate (I used yellow, orange, and white)
Lollipop sticks
Candy corns
Sprinkles

Amounts will depend on how many you'd like to cover. But one bag on melts will be enough to cover and entire package.


Step 1: Line two baking sheets with wax paper. One to prep your pops and one to lay them on to dry. 


Step 2: Open all of your Oreos up and line them up so they will be ready to go.


Step 3: Melt a small amount of candy melts or melting chocolate in a microwave bowl. I used about 2 little candy melts.


Step 4: Dip stick in candy melts/chocolate  and then press into Oreo center, you will want to gently press the stick into the icing so it doesn't stick up quite so much. Do this about three at a time, so it won't harden before placing the cookies back on,


Step 5: Replace cookie tops. Continue this process until all the cookies are ready on their sticks.


Before you move on to melting your candy melts/chocolate make sure your space is clean and organized. I know I say this a lot but I can't stress enough how much this effects your outcome. 


Step 6: Melt your melting chocolate in a microwave safe bowl. I like to melt no more then 1/2 cup at a time starting with 30 seconds at 50%-60% power and continuing in 15 second spurts stirring in between, until fully melted. It takes a bit of patience but it's so worth it! Burnt chocolate is no fun.
The amount you need will differ on how many Oreos your covering.

Step 7: Use a spoon to cover with chocolate then gently tap the stick on the side of the bowl until the bulk of the excess has dripped off. 


Step 8: You can now cover in sprinkles! If you'd like to add candy corns do so before covering in sprinkles. And don't forget to hold your sprinkles over a bowl so you can reuse. Move the finished pop to the second baking sheet.


 If you would like to make the striped ones here's how I did it. I used a piece of folded wax paper (to make it more stiff) and place it really really close to the Pop then covered the area in sprinkles. Then I moved the paper up and covered the next area then the next. You will "waste" a bit of sprinkles this way but afterwards you can just roll up the wax paper and put them back in a container, now you have a candy corn mix! Also, it helps to use a teaspoon to kind of spoon the colors on so you not covering the entire thing each time.


Now just let them lay out and harden for a bit!


 My sticks got dressed up in some stripy straws for pictures...it didn't feel right leaving them naked! ;)


 Happy baking! And remember to check back tomorrow more candy corn fun.

Happy baking -err microwaving!