Monday, November 7, 2011

How to make {Felt Pop Tarts}

I know it's been a bit since I posted, I haven't had much time to blog this week. We started off with a busy week and then the sickies came to visit. Thankfully not too bad but enough to keep us snuggled up on the couch soothing cranky babies. While the little ones nap I'm sharing a little project I did last week, felt poptarts! My kids love pop tarts so I wanted to make some for them to pretend with. Another easy project to toss in the Christmas pile:) And here's how..
 Supplies: Felt, thread, ruler, a small amount of stuffing, thin needle, beads, scissors, pins. I also used my sewing machine but they can be hand stitched.
Step 1: Cut the cream felt in 4.75in X 3.5in rectangles. And my icing color in 4.25in X 2.50in rectangles. You will need 2 cream  rectangles for every 1 icing you cut. I was able to fit 4 rectangles per felt sheet. If you planning on making several I would make paper patterns to trace.
 Step 2: Pin your icing color onto one cream colored felt.
 Step 3: Either hand or machine stitch around the icing color.
 Step 4: Hand sew beads on to make sprinkles. If you would rather not use bead you can use long embroidery thread stitches.
Step 5: Layer another cream piece underneath, pin and then sew around 3 sides outside of the icing in a cream color leaving the top open. (it's hard to see in the above photo because I stiched right outside the pink)
 Step 6: Insert a small amount of stuff to give it some depths. I literatly used just a pinch and spread it through the poptart.
Step 7: Sew the top closed. Then trim the felt around the icing just a bit, rounding the corners.
 There is is! A yummy pastry to play with! These will be stocking stuffers for my girls.

Wednesday, November 2, 2011

Candyland Party!

 Hello again. We're still stuck in the hotel (ahh!) which makes 5 weeks without a house. I would try to pretend we're on a great Vacation but the traditional army lodging, nothing to do, lack of husband most days, constant snow, and nasty below 0 tempatures outside kind of ruins that for me! On the flip side...we've been offered a home for next week which is much sooner the originally expected! Praise the Lord! So of course I have nothing new to offer, but I do have something I've never posted! Last year we threw my daughter a pretty cool Candyland themed party. But soon after was Christmas and lots of events and the dozens of pictures kinda ended up stuck on my hardrive and never shared here :) Whoops?! So 13 months and several parties later....here is her candy land inspired party!!

 I should warn you I am about to go in picture overload! We had so many RSVPs to this party we ended up having 22 kids there! YIKES! I figured so many people we were coming we should make it good. So..I went a little overboard BUT in my defense the hubby was gone for training and I had nothing but time! The clip art I used came from J.W. Illustraitons. She has since came out with some really cool Candyland images that would have made this party so much easier! I made almost all the treats, cake, ect so I don't have too much vendor info for ya!

Since I don't currently have acess to my older files I will add the invitaion later!

The food choices were kind of obvious...CANDY! I wanted create a layout where the kids would just get to go crazy for one day! No one cookie after dinner here :)
 (I sent a warning to the parents hehe)
The ONE request for her pary Cadence has was a 3 layer cake. One for each of her birthdays lol. This was my first 3 layer cake but I was happy with the out come.

I was only a few months into teach myself cake decorating so this was an accomplishment for me!
I made little paper dishes to create the look of the squares on the gameboard.

I selected a food to represent each "stop" on the board. Peppermint forest, licorice, ect. Yes I am THAT much off a detail freak!
My FAVORITE part! Gummy bear juicie boxes! These honesy containers were a trick to hunt down, but worth it in every way! Loved these! The big juice containers are animal cracker tubs from Target!

We served fresh fruits, pretzels, and subs so nobody died from a sugar high. Of course I did add a little "theme" to the subs..couldn't resist.
Decorations: Where to begin...they were everywhere! Guest were greated at the door with a Candyland banner and a gumdrop wreath.We wrapped out white porch pillars in red to look like candy canes. I used the graphics from J.W Illustraitons to create lots of different posters then I basicly bought lots of solid colored paper, tissue paper, balloons and started cutting squares! I posted them around the room to make it look like the game. It was a really easy theme because everything was just simple solid colors found just about anywhere.
First the kids picked their game pieces, which were cookies I made to look like the game pieces.
The "game" began right inside the door at the start,  gingerbread tree!


The game ended at the Candy Castle! Which was a bounce house set up in our garage..not sure where that picture went.


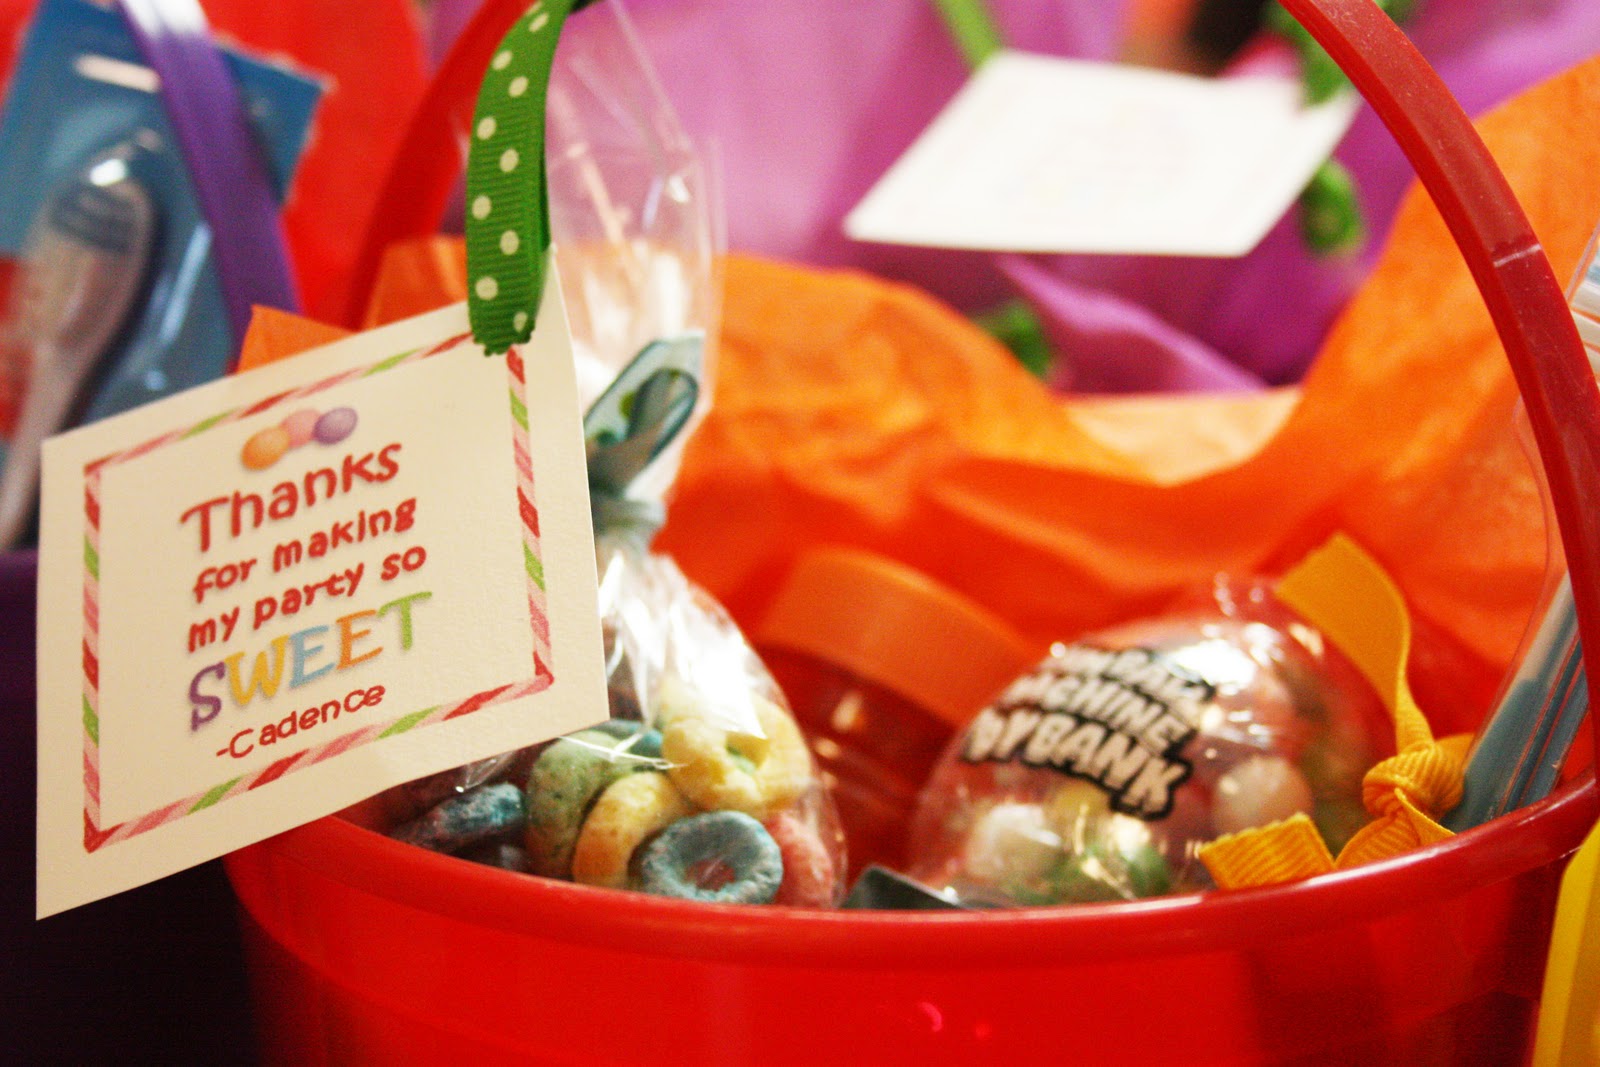
The garland here I made with tissue paper scraps and bottle caps. The party buckets came form Party city $1.00 each.
Each kid went home with several different favors, and of course...a toothbrush. I also made the baby attendees "lollipops" out of paper spoons and wrapped wash cloths.
Centerpieces easy buckets with lollipps and 3 cutouts I made.
Activities: We had lots of thing for the kids to do! I bought foam gingerbreads from Micheals and we had a gingerbread hunt (think easter eggs). I had two tables set up for the kids one with candy string and fruit loops to make necklaces, and another with coloring sheets.
Over the weeks coming up to the party I found a bunch of candy themed party treats as game prizes. I also filled a dollar store gumball machine as a guessing game.

And the kids favorite part of course..the candy buffet! When the kids were done they were able to come up and fill their bag with as much take home candy ad they wanted! (I got a little TOO much here!)
Here's my birthday girl ready to party! Can't belive this was already a year ago!
I hope this post fills you with inspiration for your next creative party!
Happy creating!

...now onto Valentines day...

Tuesday, November 1, 2011

The Pumpkin Patch Parable Cookies

Hey there! I hope everybody had a great time dressing up and eating enough sugar to put you in a coma last night :) And for all of our local friends...I pray nobody caught pneumonia.

Our night didn't exactly go as planned.After dressing up and loading our little sheep and Bo Peep in the car and driving almost an hour, it rained, and rained, and rained, and rained. And after 20 minutes of standing in the pouring rain thinking it would calm down we called it a night. It was really a bummer to see all the festivities go to waste. We loaded up all our soaking wet kids, bags, stroller, candy, and headed to a friends house where they welcomed us with dry clothes and another brought yummy snacks and food. And if your ask the kids...they weren't the least dissapointed. And really...neither were we. It ended up being a great night :)

Now, let's back up to before the rain and ruined plans. Instead of trick-or-treating our family had planned on heading up to a local Harvest festival, at which the kids dress up have lots of fun and get lots of candy! A Christian alternative to "Halloween".This is much better to us then going around post, dealing with crazy teenagers, and explaning to my 3 year old why that kid her age is covered in blood and fabric. (ugh) So of course I wanted to make something to hand out to the dozens of kids from our church we were sure to see. It had to be sweet of course...so I decided on cookies! I decided to make them based on a popular christian childrens book, The Pumpkin Patch Parable. The book provides a postive way to celebrate the season, with a farmer who carves a pumpkin and lights it teaching the kids to shine for Jesus! I made sugar cookies decorated as pumpkins with a smiley face. I then wrapped each one and added green ribbon and was going to add tags that said Shine for Jesus! The tags never made it on. And the cookies got passed out to any child/person near that would take them so I didn't have to take them all home (I made dozens of them!). I hope they were atleast enjoyed! I wanted to still share them you :)

This was a really fun way to reach the kids, in a festive and postive way :)

Friday, October 28, 2011

Baby Gifts!

    As I'm sure you've notcied...I gave the blog a little makeover. Ok more like a total overhaul. I started this blog thinking I would keep family back home updated with the girls ect. However, soon everybody and their mom was on facebook and I never really needed it. I started using it as my own little space for my crafts. Now that I have a lot of visitors stop by everyday, I should have a pretty place to greet them! I decided on the new name because it fits all three of the main catagories I blog about. My love for crafting, baking, and all things party! Even better the first letters M, B, C just happen to be the first letters of my kids name, my ultimate inspiration. I made all the elements myself, I am far too cheap to pay for one and far too pickey to find anything free I like! lol. I'm no layout pro but it serves it's purpose :) I really have come to love blogging, and I really love to see the projects people create inspired from here! Continue to share you projects with me and feel free to pass my link on to others :) Ok enough rambling...today's project isn't quiet ready to share. But I won't leave you with nothing!

Everybody around me seems to be having a baby...so I've been making lots of baby gifts. These were always my favorite things to recieve and something I couldn't wait to do with my new embroidery machine. Some of the things I like to make are onesies, blankets, fancy burp cloths, paci clips, sippy leashes, bibs...and I'm about to start some toys! Yes, having a machine makes it really easy but you don't have to have one to make these things. I have already shared the diaper wipes case here and I will eventually share all the pieces with you.

I normally wrap them up in a cordinating ribbon them add a cordinating gift bag.
These are so much fun to give!! I am SUPER excited that one of my good friends just anounced she would be joinging team PINK! Which means I get to go crazy making cutsie stuff for her. :)
Have a GREAT weekend everybody! I'm off to pop popcorn and watch movies with my kiddos tonight.