

This was such a fun project! While I was planning Miley and Bailey'second birthday party I couldn't decide on an activity for the kids....what do you do with a bunch of sugar filled 2 year olds? This of course was before we knew it would be record breaking March tempatures and we would be able to use the bounce house an swing set!
I thought about a pinata but I wasn't thrilled with the idea.I cringe everytime our kis friends have a real pinata. It always seems my kid is going to be the one going home with stitches as she gets closer and closer to the swinging stick. However, for Cadence's 1st birthday we had a pinata that was a pull string..a new concept that I love! If you haven't seen a pull string it's a pinata with a trap door which opens with a string. Each child pulls a string...when a child pulls the secret string the door opens and all the candy comes pouring out. Much better! (I know I know...I'm overprotective!)
Could I make a pinata for them? Nah. I didn't think much about it...till one day I walked into the garage and saw these large pieces of cardboard awaiting the recycling man. I couldn't let them go to waist! So one night while the hubs was on 24 hour duty I decided to try to make my own. I was so incredibly happy with the outcome! I really didn't think it would work, or be that easy. And the best part, it was totally free. Love that.
I'm going to be making more of these for sure...I knew I had to share it! So here ya go!

Gather supplies: large pieces of cardboard (I used boxes), masking tape, crepe paper, glue, pencil, box cutter, scissors, and curling ribbon.
You will also need a zip tie or wire and a rope to hang.

Step 1: Trace out the shape on your cardboard. Mine was about 20 inches tall. Make sure to use a pencil so you can erase and adjust lines until it's just right.

Step 2: Make sure you lay a layer or two of cardbord down if your cutting inside! Might be best to cut this outside or in the garage...I'm such a risk taker! Then cut out you shape using a box cutter. Yep, I have a pink box cutter. Actually I have an entire pink set of tools :) Remove the 2 and use the outline to trace it on the second piece...don't forget to lay something underneath!
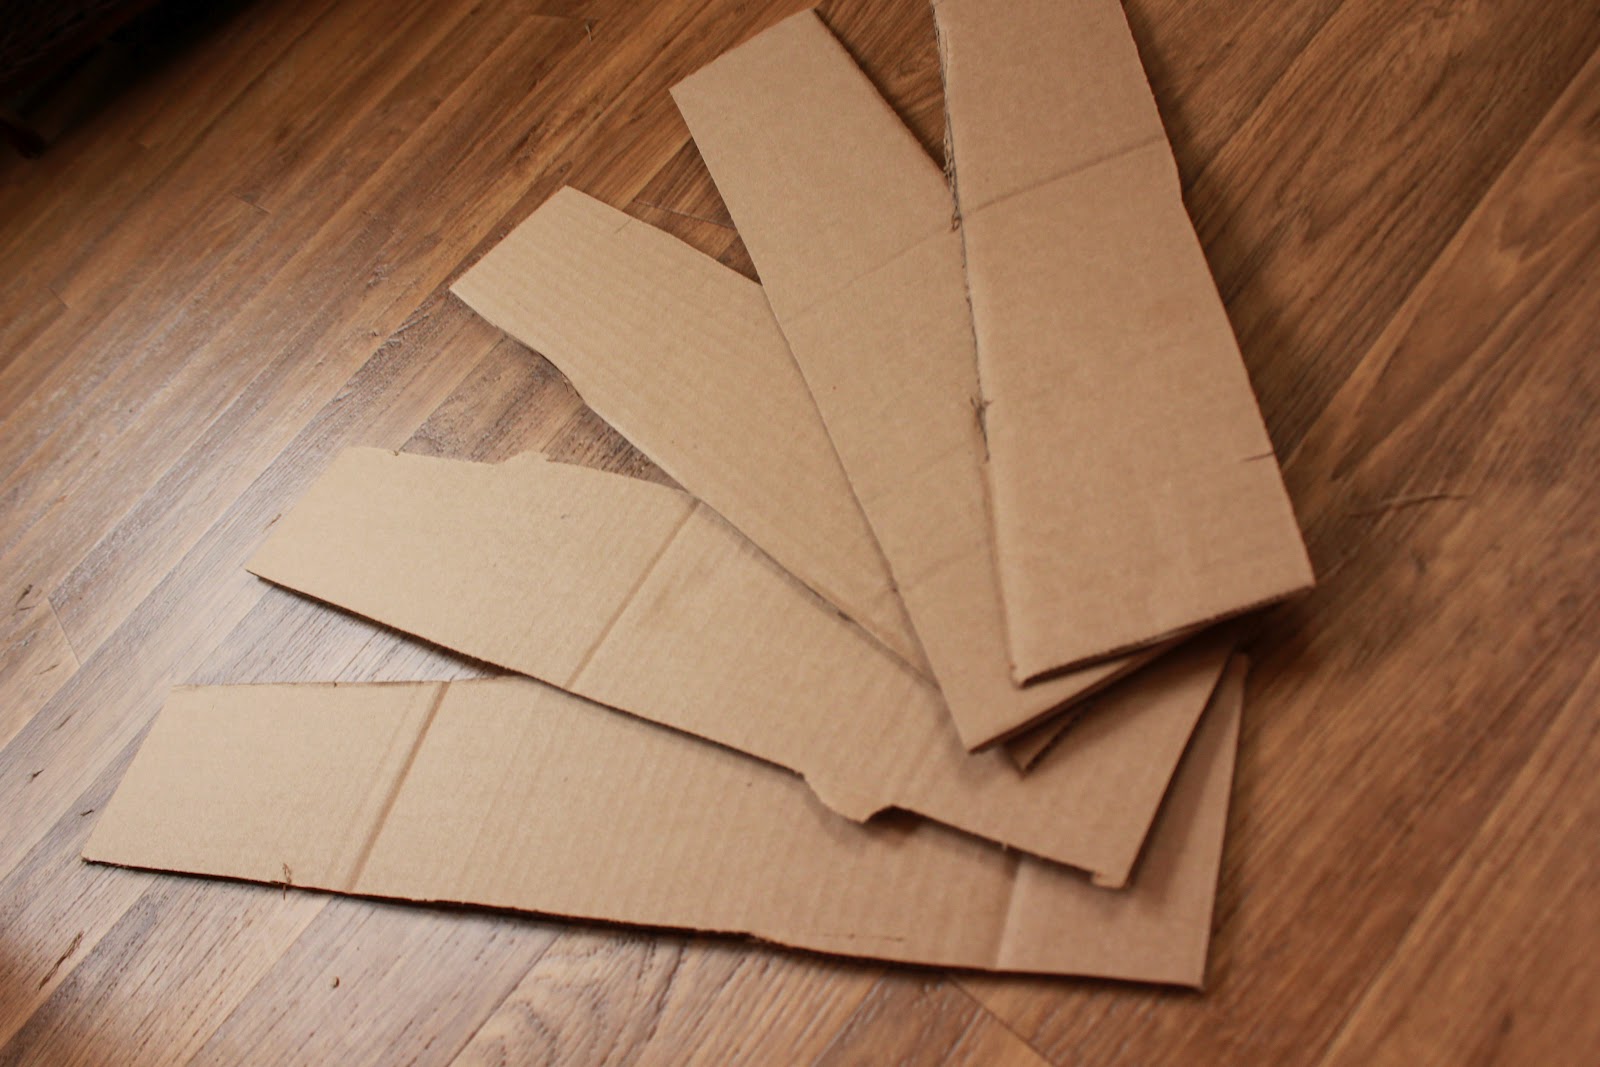
Step 3: Cut several strips of cardboard about 4.5 inches wide. The length really doesn't matther.

Here's what you should have now.

Step 4: Now you'll begin to the pinata together. I started by placing a piece on the bottom and attachng the strip.

Work your way around the shape. I thought this would be tricky but it was so simple. The cardboard bent really well and didn't put up a fight at all.
Step 5: Once your done with the first side you can lay the second side on and now tape around that. This whole process took me maybe 25 minutes. I couldn't beliv how easy and fast it was.

Here's what you've got now. Not amazingly pretty but we'll get there!

Step 6: Cut out a trap door on the very bottom, mine was about 4 inches. If your making a regular pinata you can skip this step.

Step 7: Tie a know to a long piece of curling ribbon and then tape it to the inside of the door, make sure the knot is towards the back not near the edge...just in case. Wrap the masking tape around the door...this will make it a little tighter fit as well.

Here's what it lookes like.

Step 8: Then cut another little door somewhere on the back of he pinata. This is so you can stash the candy.

Step 8: Now to decorate! Take your your crepe paper and fold it in half. Make the little fringes by cutting 3/4th way to the fold. Don't cut to the fold!

Step 9: Now you can glue the strips of crepe paper fringe right around the pinata! I used two rows o pink then two rooms of puple and so on. Warning!!! This took FOREVER! You might want to pop in a movie and make some popcorn :) What kept me going...was it looked so incredibly cute!

Step 10: Once you have wrapped it up in crepe paper there way be a few spots still naked....just do the same thing to cover. My naked spots were on top of the base of the two and under the tip of the curve.
Step 11: With elmers glue attach lots of curling ribbon strips to bottom. You want these to pull off really easy. You want to hide the "secret" strings. Let them dry for awhile..then cover with crepe paper in the same way.
Step 12: You will need to punch two holes a few inches apart. Then you can slide a zip tie in to create a loop to hang.
And there you go!!!

Now you have an awesome pinata to destroy! ;)